Thanks to a generous British reader, we have a new book in the works here at Lost Art Press that fills an important gap in hand-tool knowledge.
The story of this new book starts only about six weeks ago when John Hoffman and I went to England to research campaign furniture and to attend the European Woodworking Show at Cressing Temple.
Woodworker Richard Arnold pulled us aside at Cressing Temple and showed us two booklets from the turn of the last century. Titled “Doormaking for Carpenters & Joiners” and “Window-making for Carpenters & Joiners,” these two little booklets represent exactly the sort of thing we seek out at Lost Art Press.
These books were written by an experienced practitioner who wanted to preserve in print the hand-tool methods used for making doors and windows. Unlike many books out there on doors and windows, these little gems are aimed at the novice. They begin with the very basic stuff that you almost never see written down. Both books cover layout in an exhaustive manner (using ticking sticks I might add). And both books begin with very simple projects and progress step by step to more complex doors and windows.
I read both booklets in a day. They are outstanding, and we want to share them with you.
The bad news is that these booklets are rare. There is even a low-quality reprint of both booklets from the 1970s that is also rare. Booklets do not survive as well as books.
The good news is that Richard has loaned us two pristine originals that we are sending to a professional scanning service. We are going to combine the two booklets into one durable, hardcover book so that this sort of knowledge isn’t lost. This book deserves to be in print.
If you have ever been interested in how to make quality doors and windows in an efficient manner, I know you’ll like this book quite a bit.
I don’t have information on pricing or the release date yet. My best guess: Less than $20 and in March.
Thanks again to Richard. Readers like him make our job easier.
As the Industrial Revolution mechanized the jobs of the joiner – building doors and windows by hand – one anonymous joiner watched the traditional skills disappear and decided to do something about it.
That joiner wrote two short illustrated booklets that explained how to build doors and windows by hand. And what was most unusual about the booklets is that they focused on the basics of construction, from layout to joinery to construction – for both doors and windows.
Plenty of books exist on building windows and doors, but most of them assume you have had a seven-year apprenticeship and don’t need to know the basic skills of the house joiner. Or the doors and windows these books describe are impossibly complex or ornamental.
“Doormaking and Window-Making” starts you off at the beginning, with simple tools and simple assemblies; then it moves you step-by-step into the more complex doors and windows.
Every step in the layout and construction process is shown with handmade line drawings and clear text. The booklets are written from a voice of authority – someone who has clearly done this for a long time.
During the last 100 years, most of these booklets disappeared. Soft-cover and stapled booklets don’t survive as well as books. And so we were thrilled when we were approached by joiner Richard Arnold in England, who presented us with a copy of each booklet to scan and reproduce for a book.
We have scanned both booklets, cleaned up the illustrations and have combined them into a 176-page book titled “Doormaking and Window-Making.” In addition to the complete text and illustrations from these booklets, we have also included an essay from Arnold on how these rare bits of workshop history came into his hands.
“Doormaking and Window-Making” is a hardbound book measuring 4-1/2” wide x 7-1/4” high. It is casebound, Smythe sewn and features acid-free paper. Like all Lost Art Press books, “Doormaking and Window-Making” is printed and bound entirely in the United States. The cost is $19, and the book is scheduled to ship from Lost Art Press before Christmas. If you order before Dec. 13, domestic shipping is free. After Dec. 13, shipping will be $7.
This title will be available to our small network of retailers in the United States and internationally. If they agree to carry the book, we will announce it here on the blog.
We are proud to be publishing this almost-lost bit of workshop practice. We hope it will inform and inspire you to make your own doors and windows for your shop and home.
Because of the typical holiday insanity, I forgot to remind you that our free shipping offer for “Doormaking and Window-Making” ends on Dec. 13. Because of my mistake, we’ve decided to extend the free shipping until midnight EST on Dec. 17.
After that, shipping on this book will be $7.
We are anxiously awaiting our shipment of this book, which should arrive later this week. As soon as the truck drops them off, we’ll get all the pre-publication orders in the mail as soon as possible, even if it means making our kids go without sleep for a couple days.
If you’d like to read more about this interesting book or order it for $19, click here.
You can download a sample pdf of the doormaking section via this link. The pdf is fairly low-resolution to make it easier for you to download it. The actual scans are quite crisp.
Many woodworkers struggle when designing their own mouldings, and that’s because they haven’t studied enough of the most common forms. Imagine trying to build a chest of drawers if you had only seen a few of them.
To become fully aware of mouldings, it’s best to study their forms from about 1400 to the present. That’s outside the scope of this particular blog entry. But we can help you with the more recent stuff.
Thanks to Eric Brown, we are accumulating a nice collection of hard-to-find references on moulding shapes. Eric has a bad/good habit of picking up woodworking ephemera when he sees it and sends a good deal of it my way so I can share it here.
Thor Mikesell has digitized three of these catalogs for us. Thor is a new student to traditional woodworking, with a background in trim and finish work as well as scenic construction for the stage. He lives in Eugene, Ore., with his wife, Holly and their two dogs.
There are three catalogs for you to download, study and enjoy. All are in pdf format.
The first is the 1938 “Arkansas Soft Pine Handbook,” which was published as a way to promote use of Pinus echinata, a shortleaf pine that is technically a yellow pine but was being promoted as great for interior trim.
Aside from the interesting marketing of this pine that I grew up with, there is a fantastic visual guide to mouldings in this 68-page booklet. It is well worth downloading and taking a look at.
The second booklet is “Mouldings Millwork No. 72” from the Foremost Lumber Corp. in Brooklyn, NY. It has a similar (but not identical) array of mouldings.
This is an excerpt from “Doormaking and Window-Making” by Anonymous. This book was discovered for us by joiner Richard Arnold.
The door shown in Fig. 60 is very common as a front door in some parts of the country, although it has not much to recommend it, the long panels being very weak, and also the stiles, owing to there being no middle rail to strengthen them.
The making is very simple, being the same as an ordinary panel door, minus the middle rail; hence no detailed instructions on setting out are required here. They only mystifying point is the circular head panels, but those are only formed by the bolection moulding, the top rail being framed in square, as in Fig. 61, and the circular corner pieces glued and bradded in on the outside of the door only.
Fig. 61 – Showing Corner-Pieces in Panels
The circular moulding is formed in a lathe, as Fig. 62, and cut through to form two heads. It should be sawn through across the grain, as shown in the drawing, so that the end grain on the straight moulding will butt against the end grain on the circular moulding. In doing this, the shrinkage will be the same on each piece, and the intersection will not be affected. Of course, it must be understood that, if a good job is to be made, the turning must be accurately done, or the two will not intersect, and no amount of cleaning off will put matters right.
Fig. 62 – Circular Moulding for Tops of Panels
In making doors which have to be bolection moulded, some care is needed in gauging for the mortises, to ensure the moulding is bedding properly. If the moulding is rebated to a depth of half an inch, the gauge should be set to nine-sixteenths; the moulding will then bed tightly on the framing without any trouble. If gauged on too far, when the moulding is nailed in there is a risk of splitting at the outside edge; and if not gauged enough, the moulding will not fit closely to the framing. The medium should be aimed at, as in Fig. 63, where the moulding beds closely at A and B, and is slightly away from the panel at C.
Fig. 63 – Method of Fixing Bolection Moulding
In fitting bolection moulding, the mites should be shot as it is difficult to obtain a clean joint direct from the saw; the correct length of each piece should be taken, and the moulding cut to the marks; there will be no difficulty in making them fit accurately. The rebates are usually made slightly edge-shaped, as shown in Fig. 63, which forces the mitres up tightly as the moulding are driven in. In nailing each piece in, the nails should be driven as at D (Fig. 63); this will draw the points A and B down tightly, and at the same time allow the panels to shrink, without the danger of splitting them. This method of fixing does not, however, find favor in some parts, the favorite method being to screw the moulding from the inside of the panels, as at E. This certainly holds them firmly to the panels; but unless the latter are very dry, they are apt to split, owing to the outside edges being held by the screws. Taken on the whole, the writer prefers the former method of fixing and it must be understood that both methods should on no account be used together.
Fig. 64 – Bolection Moulded Three-Panel Door (with Section)
In Fig. 64 we have a door that will be a familiar object to some readers, but a total stranger to others: it is a bolection-moulded three-panel door, the third panel being formed by leaving out the bottom munition, and throwing the space below the middle rail into one panel. This, however, is relieved by planting on a raised panel of 3/4 in. wood, bevelled off from the centre to all four sides to a thickness of 3/8 and screwed to the panel proper from the inside. A vertical section of such a door is also shown, and an enlarged section of the bottom part appears in Fig. 65. In some cases a narrow raised panel in fixed to the upper panels in the same way as the lower, but this is not commonly done.
Fig. 65 – Enlarged Detail of Fig. 64
The above makes a very substantial good-looking door when finished, far better than that shown in Fig. 60; but to ensure lasting properties the bottom panels should be very dry, and the grain should cross in the two—that is, the panel proper should run longways, and the raised panel upright, or vice-versa.
On the principle of beginning at the bottom, we will in the present chapter take in hand the making of the “ledge” door, and what comes next to it in simplicity – the “framed ledge” door.
The former can be dismissed very shortly, the boards and ledges being prepared according to instructions in Chapter I. The whole of the former must be laid, face downwards, either flat on the bench or on two pieces of timber as wide as the ledges. They are then cramped up fairly tightly, and the ledges laid on them. The top and bottom ones of these must be fixed first, squaring them across at about 5 ins. from the respective ends of the door, and fixing them at each end with two screws in each. The intermediate ledges are then fixed in the same way, keeping them at equal distances between. A single nail can now be driven through two of the ledges into the middle board (to prevent the boards from springing out), and the door turned over. The position of the four ledges must now be squared across on the top side, as the door lies, as a guide for nailing.
Two methods of nailing are shown in Fig. 21. That shown at A is favoured by a good many persons, but the writer prefers the other (B), as not being so liable to split the ledges, and also as acting more as a brace.
When the whole of the nails are driven in, they should be sunk still further by punching ; the door can then be turned over and the nails clinched neatly, also using the punch.
The screws in the ends of the ledges (Fig. 22) are sometimes omitted, but this is a mistake, as they add very much to the strength of the door. Another mistake often made is the use of too long nails – 2 in. nails are long enough for a 1-in. door, 2-1/2-in. nails for 1-1/4″-in. door, and so on. If longer nails are used, instead of the points bending over and adding to the strength, they break off, and nearly all the holding power is gone at once.
We now come to the important matter of bracing, which is necessary for all doors over 2-1/2 ft. wide. The usual method is to brace them as Fig. 23, notching the ledges to form abutments for the ends of the braces; but after testing the matter in various ways, the writer has found that a door braced as · Fig. 24 will keep its position far better than one braced the other way, while it is far easier, more quickly done, takes less material, and presents a better appearance-consequently it is always adopted by him.
As will be seen by Fig. 24, the braces are simply cut between the ledges, and fixed by nails or screws ; the latter should at least be used at the ends.
We now come to the framed ledged door, which was sufficiently described in Chapter I to enable anyone to recognise it without further description. We can therefore presume that the framing is planed up and the boards prepared, and will proceed at once to set out the door. This requires a “setting-out rod,” on which is marked the full size, with every mortise, tenon, bead, rebate, etc., and this rod is shown in Fig. 25 (A). The full height of the door is from C to D. E is the mortise for top rail; F the haunching for same; G the mortises for the ledges; H the space from bottom of door to bottom ledge; and I the spaces between the ledges, which must be all equal.
To set out the stiles, lay them face to face on the bench, and lay the rod on them, so that the lines can be transferred from the one to the other, as shown by dotted lines from A to Y, Fig. 25, which latter show all mortises squared over and wedging marked, also gauging for mortises.
The width of the door is set out on the rod at K, the finished width being shown by L, the length from shoulder to shoulder on the face side of top rail at M, and the length of the back shoulder of top rail, and the shoulders of bare-faced tenons on the ledges at N (see dotted lines).
The three ledges and top rail are shown set out and gauged for cutting at X, Fig. 25. Perhaps it will be as well to state that the ledges are gauged with a marking gauge, set to the correct thickness of the tenon required.
One stile is shown mortised, rebated, and beaded (the haunching is shown by dotted lines) in Fig. 26, while Fig. 27 shows sections of the ledges bevelled in two different ways. O is bevelled quite through, for which the mortises should be bevelled as well, while P is bevelled on only as far as the tenons, thus requiring square mortises only.
Fig. 28 shows the back of the complete door, braced as recommended for the ledge door. The brace at the top end should be kept on the top rail; if it goes to the stile, it has a tendency to force it off, as anyone may see, if he will take notice of any doors where the brace is fixed into the angle formed by the stile and the top rail.
It is sometimes necessary to make a door in two parts, to be hinged one above the other. Such a door is shown in Fig. 29, A being a vertical section, where it will be seen that the top door shuts into a bevelled rebate, made in the top rail of the bottom door. B shows a vertical section of a similar pair of doors; but the bottom ledge of the top door is brought down and fits closely on the top rail of the bottom door. C is a section of ordinary ledge doors hung in two parts to answer the same purpose, the top ledge of the bottom door projecting above the boards, so as to form a rebate for the top door.
When hingeing doors such as these, the top one must be hung so as to throw up considerably, or they will bind in opening.
Fig. 30 is a cross-section of folding ledge doors, the strip R being screwed on to one door to cover the joint.
Fig. 31 is a cross-section of folding framed ledge doors, the two meeting stiles being rebated together and beaded as at S.
Fig. 32 shows a cross-section of a rough ledge door, in which square jointed boards are used, the strips being nailed up the joints instead of tongues. This kind of door is often used for sheds and farm buildings, and somewhat rarely in cottages.
One more word as to bracing doors. The brace should always be at the bottom of the door on the hanging side, so that it is in compression, not in tension.
Every year, your spouse and friends ask us which books they should buy for you during the holidays. And if they aren’t sure which book you want, they ask us: “Well, which books are your best-sellers?”
Until today, I had only a gut feeling about it, but I’d never really looked at the statistics. After some ciphering, I came up with a list that had a few surprises.
10. Doormaking and Window Making by Anonymous. This was a shock. This small book is a reprint of two historical texts brought to our attention by joiner Richard Arnold. It found an audience among people who restore old buildings.
9. Campaign Furniture by Christopher Schwarz. This book is one of the few in print on this style of furniture, which my grandparents collected for many years. I’ve been told by readers that it is a nice text on classical casework.
8. Kitchen Think by Nancy Hiller. I was a little surprised by this one because it was released in the summer of 2020. It’s a fantastic book, as is everything Nancy writes. If you are interested in how to design (and build) a kitchen that is in context for your house, this is the book.
7. By Hand & Eye by Jim Tolpin and George Walker. This one is no surprise. Ever since this book was released, it has continually found new audiences who are interested in designing good-looking furniture using whole-number ratios.
6. The Anarchist’s Workbench by Christopher Schwarz. On the one hand, I am not surprised to see this book on the list. It is, after all, about workbenches (the birdhouses of the intermediate woodworker clan). But on the other hand, the book is free as a pdf. Free.
5. The Woodworker’s Pocket Book edited by Charles Hayward. I love this little book. I knew it would be a home run among woodworkers, and I was (for once) correct.
4. With the Grain by Christian Becksvoort. This book is immensely popular because it is incredibly practical and avoids the heavy science stuff, but it still tells you exactly what you need to know to use solid wood in furniture effectively.
3. The Essential Woodworker by Robert Wearing. This book is a classic and should be on the shelves of every woodworker who is curious about hand-tool woodworking. We fought hard to bring it back into print, and readers have been thrilled as well.
2. The Anarchist’s Design Book by Christopher Schwarz. I am so happy to see this book on this list. This book took so many years to write and get just right. I feel like it’s the right combination of practical construction advice and a screed about poorly made and overly ornate furniture.
1. The Anarchist’s Tool Chest by Christopher Schwarz. This book helped us get this company on its feet and the capital to publish the works of other authors. Even after 10 years, this book still sells and sells – thanks to word of mouth.
On a last note, please remember that we are a small publisher (we recently graduated to “small publisher,” up from “microscopic publisher”). So none of these books would make a blip on the screens of a corporate publisher. And our annual revenue could easily be found between the couch cushions of the CEO of Penguin/Random House.
Maybe someday we’ll hit the Medium Time – with a book on birdhouses.
As the Industrial Revolution mechanized the jobs of the joiner – building doors and windows by hand – one anonymous joiner watched the traditional skills disappear and decided to do something about it. That joiner wrote two short illustrated booklets that explained how to build doors and windows by hand. And what was most unusual about the booklets is that they focused on the basics of construction, from layout to joinery to construction – for both doors and windows.
Plenty of books exist on building windows and doors, but most of them assume you have had a seven-year apprenticeship and don’t need to know the basic skills of the house joiner. Or the doors and windows these books describe are impossibly complex or ornamental.
“Doormaking and Window-Making” starts you off at the beginning, with simple tools and simple assemblies; then it moves you step-by-step into the more complex doors and windows.
Every step in the layout and construction process is shown with handmade line drawings and clear text. The booklets are written from a voice of authority – someone who has clearly done this for a long time.
During the last 100 years, most of these booklets disappeared. Booklets don’t survive as well as books. And so we were thrilled when we were approached by joiner Richard Arnold in England, who presented us with a copy of each booklet to scan and reproduce for a book.
VENETIAN, or, as they are sometimes called, marginal light, windows are very fashionable at the present time, having in a great measure replaced the bay window, although the same style is sometimes adapted to the bay, instead of the usual upside-down sliding sashes. These windows are, as may be gathered from the drawings, of the casement variety, and the sashes should be made to open outwards if possible, this being the better way to keep out the wet.
In Fig. 108 we show one of these windows fitted with four lights or casements, the two outside ones being hinged to the jambs, and the two middle ones, which fold together, being hinged in like manner to the mullions. The casements in this frame run from sill to head, the upper part being divided into small squares as shown, which is the simplest way of forming an artistic window.
Another method of filling in these window frames is shown in Fig. 110, which shows the filling between the mullions. Here the casements are in two heights, the bottom pair being hinged in the ordinary way to the mullions ; the other, which is wide enough to fill the whole space, is hinged at the top, and opens outwards, the bottom rail of this fitting to the others either as section, Figs. 111 or 112. The former is the simplest way and least liable to get out of order, but the latter is best as regards the stopping out of wind and water; but when the window has been repainted a few times it is apt to work badly.
Windows made in this way are very convenient, as it is possible to have the top only open, or the whole, as required. The folding casements in either style of window come together with a rebated joint, as Fig. 113.
Suitable sections for head and sill for these frames are shown in Fig. 114, the grooves in the latter being to form a cement key under, and to take the window board. It will also be noticed that the bevel of the sill finishes with a hollow, forming an undercut rebate ; this should not be omitted, owing to its use as a water trap.
As the Industrial Revolution mechanized the jobs of the joiner – building doors and windows by hand – one anonymous joiner watched the traditional skills disappear and decided to do something about it.
That joiner wrote two short illustrated booklets (combined here into one volume) that explained how to build doors and windows by hand. And what was most unusual about the booklets is that they focused on the basics of construction, from layout to joinery to construction – for both doors and windows.
Plenty of books exist on building windows and doors, but most of them assume you have had a seven-year apprenticeship and don’t need to know the basic skills of the house joiner. Or the doors and windows these books describe are impossibly complex or ornamental.
“Doormaking and Window-Making” starts you off at the beginning, with simple tools and simple assemblies; then it moves you step-by-step into the more complex doors and windows.
The fitting and hanging (or hingeing) of doors in a proper manner, is quite as important as the making, therefore we include the present chapter in this handbook, with the idea that it would not be complete otherwise.
To fit a panel door of any description, first take the exact width of the opening and transfer to the door, taking a piece off each stile if necessary, so that these will appear of equal width. If the door simply requires planing, which is as it should be, or if wider, after sawing off the waste at each side, plane the left-hand stile and fit it to the corresponding post, then do likewise with the other, making the door so that when close up to one side there is a space of a sixteenth of an inch parallel at the other.
The door must now be placed in position, close up to one post, as in Fig. 124, and scribed along the bottom with compasses. Whether the projecting stiles only are cut off, or a certain portion of the bottom rail as well, depends upon the height of the door compared with the opening. If the one is much higher than the other, a good portion of the waste should be removed from the bottom rail, leaving the top rail the same width as the stiles. This, of course, must be ascertained by actual measurement before scribing. Having scribed and cut off the bottom of the door, stand it up again, and mark the height required on the stiles, and in cutting off at the top, allow for the same play here as at each side and slightly more at the bottom.
In planing the edges of the door, that on the hanging side may be planed exactly square; but it is best to plane the other edge slightly under, as at A, Fig. 125, thus giving the door more clearance as it opens : especially does this apply to thick doors – in fact, in many cases the rebates are bevelled if the doors are thicker than one and a half inches.
The fitting of ledge doors is the same as described above,· except that so much trouble need not be taken, there being no stiles to keep equal in width.
For outside doors the play at sides and especially at the bottom must be greater than for inside, otherwise they will be liable to stick and require easing; while in many cases more play must be allowed at the bottom of room doors, to allow these to open over carpet or linoleum : of this, more later on.
If the doors are alike both sides, as in ordinary room doors, the hollow side (if the door is not flat, as is sometimes the case) must be fitted towards the rebates, as in Fig. 126 A – the fastening will then keep the door tight ; but if the round side is put to the rebates, as Fig. 126 B, there will always be a space at top and bottom, and the door will also rub the post in the middle, at the hinge side, as it opens.
For ledge doors the usual hinges are the “cross garnett ” or “tee” hinges, examples of which are given in Fig. 127. The fixing of these is very simple: the door is stood up in position, blocking it so that it has the correct play all round, and the hinges screwed on as in Fig. 128. The top hinge should have the knuckle immediately over the joint, but the bottom should be placed back further on to the post as shown. This has the effect of throwing the front of the door up as it opens, as shown in Fig. 129.
Panel doors are invariably hung with “butt hinges,” a front and end view of which we show in Fig. 130, and these may be fixed by letting the whole thickness into the door, as Fig. 131 A; by letting half into the door and half into the post, as Fig. 131, B, or by letting them in on the skew, as Fig. 131 C. The first is the jerry builder’s method, being done quickly; the second is the joiner’s method, and the correct one for all purposes as regards house doors ; while the third is usually adopted by cabinet makers, and is correct for furniture, but more difficult to do properly. The “butts” should be let into the door first, the correct positions being 6 ins. from the top and 10 ins. from the bottom of the door. The distance on the edge from the face should be slightly less than the width of the butt to the centre of the pin on which it turns, and the depth of the recess should be the thickness of one leaf of the butt. The length of the recess should be marked by laying on the butt itself, each one in the position it will fill, as they vary in size slightly.
The recess as marked is shown in Fig. 132, while Fig. 133 A and B show the effect of letting the butt in too far on the edge, and not far enough respectively, the one causing the door to scrape the frame as it opens, and the other leaving an ugly gap between when the door is open. After letting the butts into the door, and screwing them tightly, the door should be placed in position, blocking it so that it has its proper play all round, as in Fig. 134. Then with the butts open, mark on the frame at the bottom and top of each for the height, and down by the knuckle for the depth of the recess. The door can then be removed, the height marks squared across, and the gauge used for the width. On cutting the wood out to the marks, the door may be fixed temporarily with one screw in each butt, and if found to be correct (as it should be) the remaining screws can be inserted, while, if not correct, alteration must be made accordingly.
In the above description we are assuming that the door and frame are both made true – that the door is of parallel thickness, and the rebate slightly deeper to give the necessary play; but in many cases we regret to say that the frame is rebated without any regard to the thickness of the door, and if so, the door may either bind on the rebate, if the latter is not deep enough, or may not fit close enough to it, if too deep. To get over this difficulty, the gauging for the width of the recess should be done from the edge of the rebate, and the inside of the door respectively, taking great care that the hinges are not let in far enough to make the door bind, as in A Fig. 133.
Doors may be made to rise as they open by using rising butts, but these are clumsy in appearance : the only difficulty in fixing is to take special care to get them fitted correctly, and also to get them the right hand for the door, or they will throw the door down instead of up.
Instead of using rising butts, the door may be made to rise in front as it opens, by allowing the bottom butt to project more than the top one, as in Fig. 135. This means different gauging for each butt, but it often has to be done, the floors in many cases being low at the doorway, owing to the weight of the walls causing the joists to settle slightly.
Spring butts, both double and single, are fixed in exactly the same way, and also all other kinds of hinges, the principle being the same throughout.
One word as to fitting of folding doors: care should be taken to keep the outside stiles on each door the same width, even if the middle stiles are not exactly the same. Also take care to keep the rails in each pair of doors level, or the appearance is spoiled. Fig. 136 shows a pair of doors correct in respect to the former point, but incorrect as to the latter; while Fig. 137 is the reverse – the rails are right, but the stiles are uneven. A little care in fitting will make both right, and there is no excuse for neglecting it.
As the Industrial Revolution mechanized the jobs of the joiner – building doors and windows by hand – one anonymous joiner watched the traditional skills disappear and decided to do something about it.
That joiner wrote two short illustrated booklets that explained how to build doors and windows by hand. And what was most unusual about the booklets is that they focused on the basics of construction, from layout to joinery to construction – for both doors and windows.
Plenty of books exist on building windows and doors, but most of them assume you have had a seven-year apprenticeship and don’t need to know the basic skills of the house joiner. Or the doors and windows these books describe are impossibly complex or ornamental.
“Doormaking and Window-Making” starts you off at the beginning, with simple tools and simple assemblies; then it moves you step-by-step into the more complex doors and windows.
Every step in the layout and construction process is shown with handmade line drawings and clear text. The booklets are written from a voice of authority – someone who has clearly done this for a long time.
During the last 100 years, most of these booklets disappeared. Booklets don’t survive as well as books. And so we were thrilled when we were approached by joiner Richard Arnold in England, who presented us with a copy of each booklet to scan and reproduce for a book.
We have scanned both booklets, cleaned up the illustrations and have combined them into a 176-page book titled “Doormaking and Window-Making.” In addition to the complete text and illustrations from these booklets, we have also included an essay from Arnold on how these rare bits of workshop history came into his hands.
VENETIAN, or, as they are sometimes called, marginal light, windows are very fashionable at the present time, having in a great measure replaced the bay window, although the same style is sometimes adapted to the bay, instead of the usual upai1d-down sliding sashes. These windows are, as may be gathered from the drawings, of the casement variety, and the sashes should be made to open outwards if possible, this being the better way to keep out the wet.
In Fig. 108 we show one of these windows fitted with four lights or casements, the two outside ones being hinged to the jambs, and the two middle ones, which fold together, being hinged in like manner to the mullions. The casements in this frame run from sill to head, the upper part being divided into small squares as shown, which is the simplest way of forming an artistic window.
Another method of filling in these window frames is shown in Fig. 110, which shows the filling between the mullions. Here the casements are in two heights, the bottom pair being hinged in the ordinary way to the mullions ; the other, which is wide enough to fill the whole space, is hinged at the top, and opens outwards, the bottom rail of this fitting to the others either as section, Figs. 111 or 112. The former is the simplest way and least liable to get out of order, but the latter is best as regards the stopping out of wind and water; but when the window has been repainted a few times it is apt to work badly.
Windows made in this way are very convenient, as it is possible to have the top only open, or the whole, as required. The folding casements in either style of window come together with a rebated joint, as Fig. 113.
Suitable sections for head and sill for these frames are shown in Fig. 114, the grooves in the latter being to form a cement key under, and to take the window board. It will also be noticed that the bevel of the sill finishes with a hollow, forming an undercut rebate ; this should not be omitted, owing to its use as a water trap. The same also applies to the groove in the bottom rail of the casement, which tends to the same purpose. In these windows the jambs are the same in section as the head, and the mullions the same, but worked both sides ; thus there is no need to· give sectional illustrations of these.
Fig. 115 shows a window of a more ambitious kind, and which is not strictly Venetian, though often called so. In addition to the mullions, as in the former example, the present window is divided in height by the insertion of a transome. A half-sectional plan of this window is given in Fig. 116 (this will also serve the same purpose for Fig. 108, both being alike in this respect), and a vertical section in Fig. 117. In these sections the whole of the framing is flush at both sides, the sashes being kept back from the face sufficiently far to allow of a somewhat heavy chamfer being run round, as shown in Fig. 118, but the frame is improved if the transome and sill is made to project as in the section (Fig. 119). This is also an additional safeguard against the wet, the projections allowing of a water groove being made underneath, as shown.
Fig. 119 also shows an alternative moulding on the inside of the frame, in place of the chamfer shown in Fig. 114, and in many cases the transome is made use of to introduce more or less elaborate mouldings. These, however, make no difference as regards method of making, though it may do in the setting out, which must in every case be dealt with according to requirements.
In Fig. 120 we show the rod for setting out the frame of the window shown in Fig. 115, which, for the sake of illustration, is 8 ft. wide by 6 ft. high outside, the framing throughout being 4-1/2 ins. wide by 3 ins. thick. The width of the frame is on the side of the rod marked A, the marks B show the full width of frame, outside. From B to C, inwards, should be the thickness of the framing after it is planed up, which will probably be 1/8 in. under the 3 ins., and from C to D, outwards, is the depth of the rebate. From C at each end set off the width of the side lights, or, rather, the distance from jamb to mullion, and the thickness of the framing again, which gives us E and F, and from these mark off the depth of the rebates again, thus getting G.
In setting out the stuff from the rod, the marks D and G will be for the mortises, those coming in the rebates, as shown by dotted lines in Fig. 119, and if the sashes have to come flush with the framing outside the same marks will be the shoulder lines for the transome on the outside edge. The dotted lines on the rod will be the shoulder lines for the inside of the transome, and also for the outside, if the framing is allowed to project, and is chamfered as in Fig. 118.
The height rod is set out on the side marked H, the lines I showing the full height, 6 ft. K is the thickness of the sill (which we should have said is 4 ins. instead of 3 ins.), then L and M for the depth of rebate and the bevel respectively, the latter being made to correspond with the inside chamfer.
From I at the top set off the thickness of the framing and back the depth of the rebate, thus getting N and O respectively. Now measure up the height of the bottom casements from K, set off the thickness of the framing above this, and back from each, 1/2 in. for depth of rebate, and again from the top one of these for the bevel on transome. This gives us the marks P, R, and S, respectively.
In setting out this from rod, the marks M and 0 are the shoulder lines at sill and head on the outside, L giving the angle in the former, while S will be the shoulder lines for the mullion under the transome. T is the same above the transome, and the line between R and T gives the angle.
The shoulder lines on the inside are the same as M and T at the sill and upper side of transome, and as dotted lines under the latter, and at the head.
The rod for setting out of the sashes of Fig. 118 is given in Fig. 121, and as this is simply the same as what is met with in ordinary windows, no detailed description is necessary, the sizes marked on being sufficient.
Thanks to a generous British reader, we have a new book in the works here at Lost Art Press that fills an important gap in hand-tool knowledge.
The story of this new book starts only about six weeks ago when John Hoffman and I went to England to research campaign furniture and to attend the European Woodworking Show at Cressing Temple.
Woodworker Richard Arnold pulled us aside at Cressing Temple and showed us two booklets from the turn of the last century. Titled “Doormaking for Carpenters & Joiners” and “Window-making for Carpenters & Joiners,” these two little booklets represent exactly the sort of thing we seek out at Lost Art Press.
These books were written by an experienced practitioner who wanted to preserve in print the hand-tool methods used for making doors and windows. Unlike many books out there on doors and windows, these little gems are aimed at the novice. They begin with the very basic stuff that you almost never see written down. Both books cover layout in an exhaustive manner (using ticking sticks I might add). And both books begin with very simple projects and progress step by step to more complex doors and windows.
I read both booklets in a day. They are outstanding, and we want to share them with you.
The bad news is that these booklets are rare. There is even a low-quality reprint of both booklets from the 1970s that is also rare. Booklets do not survive as well as books.
The good news is that Richard has loaned us two pristine originals that we are sending to a professional scanning service. We are going to combine the two booklets into one durable, hardcover book so that this sort of knowledge isn’t lost. This book deserves to be in print.
If you have ever been interested in how to make quality doors and windows in an efficient manner, I know you’ll like this book quite a bit.
I don’t have information on pricing or the release date yet. My best guess: Less than $20 and in March.
Thanks again to Richard. Readers like him make our job easier.
As the Industrial Revolution mechanized the jobs of the joiner – building doors and windows by hand – one anonymous joiner watched the traditional skills disappear and decided to do something about it.
That joiner wrote two short illustrated booklets that explained how to build doors and windows by hand. And what was most unusual about the booklets is that they focused on the basics of construction, from layout to joinery to construction – for both doors and windows.
Plenty of books exist on building windows and doors, but most of them assume you have had a seven-year apprenticeship and don’t need to know the basic skills of the house joiner. Or the doors and windows these books describe are impossibly complex or ornamental.
“Doormaking and Window-Making” starts you off at the beginning, with simple tools and simple assemblies; then it moves you step-by-step into the more complex doors and windows.
Every step in the layout and construction process is shown with handmade line drawings and clear text. The booklets are written from a voice of authority – someone who has clearly done this for a long time.
During the last 100 years, most of these booklets disappeared. Soft-cover and stapled booklets don’t survive as well as books. And so we were thrilled when we were approached by joiner Richard Arnold in England, who presented us with a copy of each booklet to scan and reproduce for a book.
We have scanned both booklets, cleaned up the illustrations and have combined them into a 176-page book titled “Doormaking and Window-Making.” In addition to the complete text and illustrations from these booklets, we have also included an essay from Arnold on how these rare bits of workshop history came into his hands.
“Doormaking and Window-Making” is a hardbound book measuring 4-1/2” wide x 7-1/4” high. It is casebound, Smythe sewn and features acid-free paper. Like all Lost Art Press books, “Doormaking and Window-Making” is printed and bound entirely in the United States. The cost is $19, and the book is scheduled to ship from Lost Art Press before Christmas. If you order before Dec. 13, domestic shipping is free. After Dec. 13, shipping will be $7.
This title will be available to our small network of retailers in the United States and internationally. If they agree to carry the book, we will announce it here on the blog.
We are proud to be publishing this almost-lost bit of workshop practice. We hope it will inform and inspire you to make your own doors and windows for your shop and home.
Because of the typical holiday insanity, I forgot to remind you that our free shipping offer for “Doormaking and Window-Making” ends on Dec. 13. Because of my mistake, we’ve decided to extend the free shipping until midnight EST on Dec. 17.
After that, shipping on this book will be $7.
We are anxiously awaiting our shipment of this book, which should arrive later this week. As soon as the truck drops them off, we’ll get all the pre-publication orders in the mail as soon as possible, even if it means making our kids go without sleep for a couple days.
If you’d like to read more about this interesting book or order it for $19, click here.
You can download a sample pdf of the doormaking section via this link. The pdf is fairly low-resolution to make it easier for you to download it. The actual scans are quite crisp.
As the Industrial Revolution mechanized the jobs of the joiner – building doors and windows by hand – one anonymous joiner watched the traditional skills disappear and decided to do something about it.
That joiner wrote two short illustrated booklets that explained how to build doors and windows by hand. And what was most unusual about the booklets is that they focused on the basics of construction, from layout to joinery to construction – for both doors and windows.
Plenty of books exist on building windows and doors, but most of them assume you have had a seven-year apprenticeship and don’t need to know the basic skills of the house joiner. Or the doors and windows these books describe are impossibly complex or ornamental.
“Doormaking and Window-Making” starts you off at the beginning, with simple tools and simple assemblies; then it moves you step-by-step into the more complex doors and windows.
Every step in the layout and construction process is shown with handmade line drawings and clear text. The booklets are written from a voice of authority – someone who has clearly done this for a long time.
During the last 100 years, most of these booklets disappeared. Soft-cover and stapled booklets don’t survive as well as books. And so we were thrilled when we were approached by joiner Richard Arnold in England, who presented us with a copy of each booklet to scan and reproduce for a book.
Below is the introduction that Richard Arnold wrote for us. It is a family story that comes full circle and brings these booklets with it.
The story of how this book has come to be republished is a tale that goes back more than 100 years.
At the end of World War I, one of the lucky survivors of the trenches came home to England and started a new career as a carpenter and joiner. He was my grandfather, and his name was Cecil Incles.
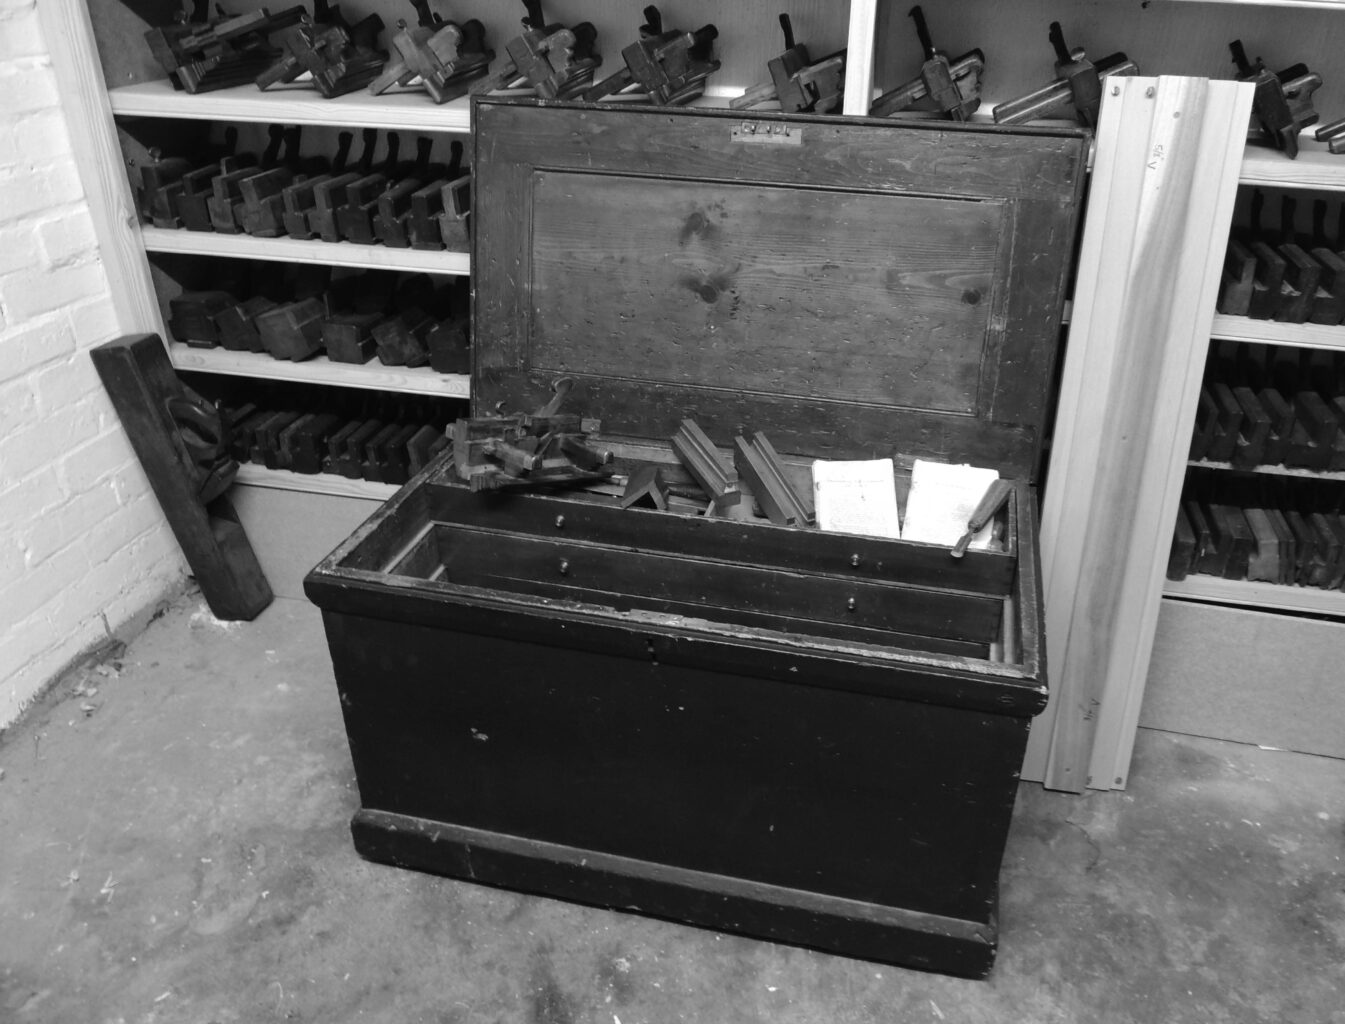
Sometime during his apprenticeship, he managed to purchase a tool chest – complete with tools – that had belonged to a joiner by the name of G. Shelton. To date I have not been able to find any clues as to who Mr. Shelton was, but by dating the tools in his chest, it is reasonably safe to assume he assembled them sometime around the end of the 19th century. Judging by the types of tools in his chest it is obvious that he was a joiner, and amongst other things, he would have spent a lot of his time making doors and windows.
Lying in the bottom of the chest were two well-worn little booklets on door and window-making. They date from around 1910, so I think it is safe to assume they were first purchased by Mr. Shelton. I’m sure he found them helpful, as I presume my grandfather did after him.
On completion of his apprenticeship, my grandfather moved back to his birthplace and started work for a small building firm in a nearby market town. For the next 50 years, he worked as a joiner for the same company right up to his retirement. After his death in 1976, my father decided to hang on to my grandfather’s old tool chest, along with its contents, a decision that I am forever grateful for.
Two years after my grandfather’s death, I left school at age 16 with no clear idea of what I was going to do with my life. As luck would have it, the old building firm that my grandfather had worked for was looking for an apprentice to train in its joiners’ shop. So with hardly any woodworking experience at all, I found myself working under the watchful eye of “old Arthur.” Coincidently, Arthur had been one of my grandfather’s apprentices. My father had no great interest in woodwork, so he was happy to pass the tool chest and its contents to myself to use in my new career.
It is no exaggeration to say that this tool chest, and more importantly its contents, changed my life. Most of the tools in the chest were of no use in a modern working environment, but I became fascinated as to what they had been used for and how they were used. This led to a lifelong passion for anything to do with the history of woodworking, and the tools and techniques that surround the subject.
I soon discovered the two little booklets in the bottom of the chest, and I was surprised as to how relevant the information within them was to my everyday work. In time, they became my main point of reference whenever I’m working on doors or windows.
In the age where doors and windows were made by hand, the apprentice learned the basics under the watchful eye of his master. No one expected to have to record these skills; they were merely the basics, passed down from one generation to the next. But with the onset of the machine age and mass production, a lot of these techniques were soon lost.
The anonymous author of these booklets must have had the foresight to see this coming, and we should be forever grateful to him for recording his obvious years of experience making doors and windows as a joiner.
For years, I have recommended these wonderful booklets to fellow craftsmen, but sadly I could offer them no hope of finding copies for themselves because they rarely, if ever, came onto the open market. I would like to applaud Lost Art Press for making them available once again to everyone with an interest in keeping these traditional skills alive.
Richard Arnold November 2013 Northamptonshire, England
We just received new stock of the Bowen’s book, and it was charged a tariff.
First the good news: Tariffs aren’t yet affecting Lost Art Press books. We print entirely in the United States. But some of the raw materials, including some of the papers we use, come from Canada. We follow the issue closely, and our books might not see any price increases.
The bad news: metal prices are on the rise because of the tariffs. And the only book we import, “The Welsh Stick Chair: A Visual Record” by Tim and Betsan Bowen was just walloped by a tariff. We had to raise the price significantly.
This is a great book, and I hope we can carry it going forward. But no promises.
We just got the first batch of Crucible Curved Card Scrapers in from the machine shop. These have been out of stock for far too long. I bought the steel before all the tariffs went into effect, so the price is the same ($25). I have no idea what will happen to the price with the next batch (some steel components have doubled in price in the last month).
So buy them now while they are this price.
Finally, we have also restocked on “Doormaking and Window-Making.” There is no price change for this Michigan-printed book.